Define the plate size
Define the plate size for your assay template to establish how many rows and columns the plate uses.
Before you begin
About this task
To define plate sizes in PLA 3.0, you use position factors. They let you define the number of rows and columns on a plate and, if needed, also the number of plates. Quantitative response assay documents created from scratch do not contain position factors.
This use case uses one plate only. You therefore define row and column position factors only. For details on position factors, see the Position factors topic.
Procedure
To define the plate size:
- In the Content editor, go to .
-
In the Creatable elements pane, double-click
Column: Position.
Results: Your assay document now has one position factor.
-
To add the second factor, right-click the Column:
Position element, and then select Duplicate
element.
Results: Your assay document now has two position factors.
-
Configure the rows of your plate.
-
Rename the first position factor to Row.
This is the column name shown in the Observations editor.
- Use the Number of positions setting to set the number of rows to 8.
- By default, PLA 3.0 uses numbers for the rows in the By Position editor. To switch to alphabetical row labels ('A' to 'H'), select 'true' from the Map index to characters drop-down list.
-
Rename the first position factor to Row.
-
Configure the columns of your plate.
-
Rename the second position factor to
Column.
This is the column name shown in the Observations editor.
- Use the Number of positions setting to set the number of columns to 12.
Results: Your Observation data node should now look like this: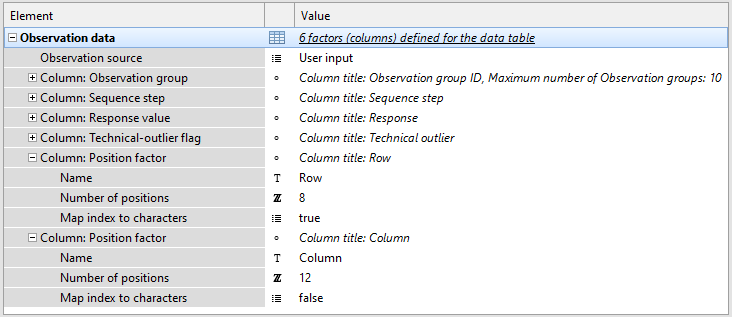
Figure 1. Row and column position factors of a 96-well plate, displayed in the Observation data element of the Content editor -
Rename the second position factor to
Column.
- Save the template.