Create a shareable SQLite database
Create an SQLite database and make it available for multiple users on a shared folder or a file server.
Important:
This database setup is not intended for simultaneous use.
Procedure
To create a shareable SQLite database:
- Start PLA 3.0 but do not log in.
-
In the Login dialog, select Tools >
 Database
management.
Database
management.
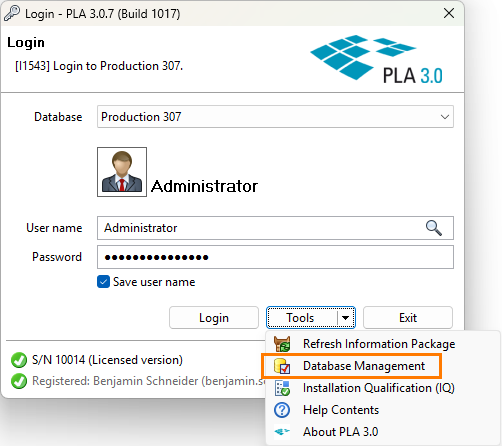
Figure 1. Database management feature in the Login dialog - At the bottom of the Manage database connection profiles dialog, select Add....
- In the Database connection management wizard, select the Standard mode option and select Next >.
- Select the Create new database option.
- To make the new database shareable in your network, select the Database profile is available for all users on this computer option.
- From the Type drop-down list, select SQLite and select Next >.
-
Enter the database connection parameters:
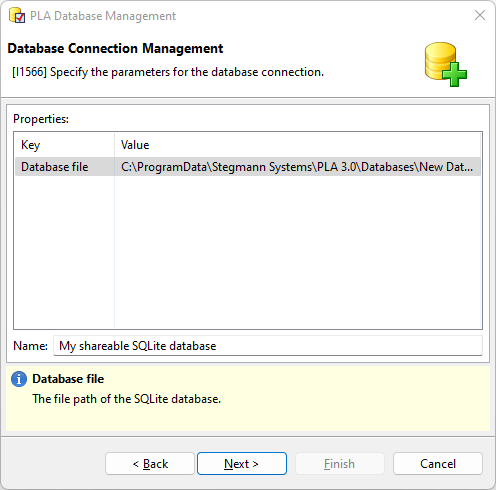
Figure 2. Database connection parameters for an SQLite database -
PLA 3.0 creates the SQLite database in the folder
displayed in the Value column. To select a
different folder, in the column, use the ellipsis button
(…) to navigate to the folder you want to
use.
Note:If you change the default folder, make sure the new folder is accessible by all users who should be able to connect to the database.
-
In the Name text box, enter a name for the
database connection profile and select Next
>.
Tip:When logging in to PLA 3.0, you see this name in the Database drop-down list.
-
PLA 3.0 creates the SQLite database in the folder
displayed in the Value column. To select a
different folder, in the column, use the ellipsis button
(…) to navigate to the folder you want to
use.
- Select the Standard template option and select Next >.
-
Enter the credentials that you want to use for the administrative account of
the database and select Finish.
Important:We recommend storing your database credentials in a secure location. You need them to manage the database and user accounts. We cannot recover your credentials because we do not have access to them.