Import assays into PLA 3.0
Import the extracted assays from the synchronization folder into your PLA 3.0 target database.
Document type required for this task: PLA 2.x Database synchronization document.
Before you begin
Procedure
- Log in to PLA 3.0 with your PLA administrator account.
- In the Navigator, create a root folder for your archive.
-
Create the PLA 2.x Database synchronization document that is required to control
the import process:
-
Right-click the archive root folder, and select
 New.
New.
-
In the Create a new document dialog, navigate to , and select
 'New PLA 2.x Database synchronization document.'
- Select Create.
-
Right-click the archive root folder, and select
-
Set up the document in the Content editor:

Figure 1. Setup of a PLA 2.x Database synchronization document - Save the document.
-
To start the import process, on the action bar, select
 Synchronize.
Note:If the Synchronize button is not available, make sure the PLA 2.x Archive Import Module add-on is activated in the PLA 3.0 database.
Results
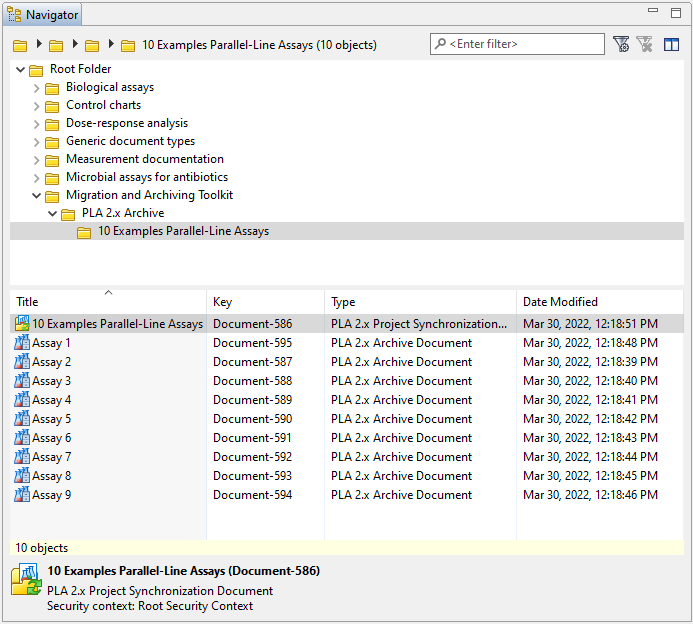
For each project you imported from the PLA 2.x source database, a project subfolder is created in the archive root folder. In each project subfolder, the following document types are created:
 PLA 2.x Assay archive
-
For each PLA 2.x assay in the imported project, a PLA 2.x Assay archive document is created in the project subfolder.
 PLA 2.x Project synchronization
-
A PLA 2.x Project synchronization document is created that stores information about all the assays in the project folder.
Tip:Use the Dashboard of this document to view a list of the first 100 assays you imported, or start a bulk migration. If you imported more than 100 assays, you have to open the report to view the complete list.
Example
In the following example, the 'Migration and Archiving Toolkit' folder holds the data created by the Toolkit. After importing the '10 Examples Parallel-Line Assays' project, the 'PLA 2.x Archive' archive root folder contains the corresponding project subfolder, which in turn holds nine PLA 2.x Assay archive documents as well as the PLA 2.x Project synchronization document.

